

Savolture Technical Guide
DIY Powerwall LiFePO4: Cost, Safety & the Two Build Paths (2026)
Building your own LiFePO4 powerwall is one of the most satisfying projects in home energy — and one of the easiest to get dangerously wrong. The appeal is obvious: a 14kWh wall ...
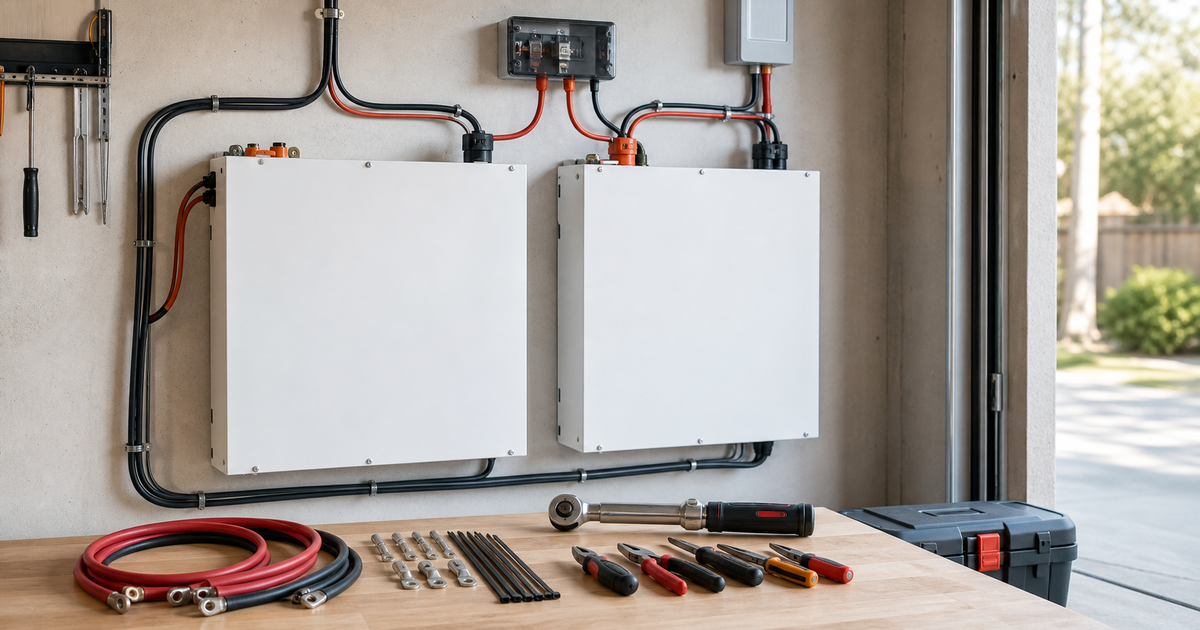
Building your own LiFePO4 powerwall is one of the most satisfying projects in home energy — and one of the easiest to get dangerously wrong. The appeal is obvious: a 14kWh wall of storage for a fraction of a name-brand system, built exactly to your spec, fully under your control. But the gap between a clean, safe DIY build and a fire risk bolted to your garage wall comes down to a handful of decisions most guides skip past. This guide won’t hand you a wiring diagram — high-voltage DC and grid interconnection are not a follow-the-steps job. Instead it gives you the two things that actually determine whether your build succeeds: which path of DIY to take, and where the line sits between what you can safely do yourself and what legally needs a licensed electrician.
Quick answer: A DIY LiFePO4 powerwall means assembling your own home battery from LiFePO4 (LFP) components instead of buying a finished system. There are really two paths: cell-level DIY (buying bare prismatic cells, spot-welding busbars, and configuring your own BMS — cheapest, but the highest skill and safety burden) and module-level DIY (buying pre-assembled 48V modules with a built-in certified BMS, then doing your own mounting, wiring, and integration). Both save money over a turnkey install. The single biggest safety factor is the Battery Management System: a mismatched cell pack with a hobby BMS is one of the most commonly cited causes of DIY powerwall fires. Whichever path you choose, the final AC connection to your home almost always requires a licensed electrician and a permit under the National Electrical Code.
- Are you comfortable working with high-voltage DC and diagnosing a BMS fault? If not, module-level DIY is the safer entry point.
- Have you priced the real total — cells + BMS + busbars + enclosure + tools like a spot welder — not just the cell cost?
- Do you know which parts of your build your local code lets you do yourself, and which need a licensed electrician?
- Is your goal genuinely to build, or just to save money? If it’s only the money, a pre-assembled module may get you there faster with less risk.
What a DIY LiFePO4 Powerwall Actually Is
A powerwall — lowercase, the generic term — is a wall-mounted home battery that stores energy from solar or the grid and discharges it to run your house during outages, at night, or to shave peak-rate power bills. “DIY” simply means you assemble it yourself from components rather than buying a sealed, finished unit.
LiFePO4 (lithium iron phosphate, or LFP) is the chemistry of choice for home builds for one reason above all: thermal stability. Compared to the NMC chemistry in many EV packs and older power tools, LFP has a much higher thermal runaway threshold, doesn’t off-gas as violently, and delivers 6,000+ cycles at 80% depth of discharge — often 10 to 15 years of daily use. That safety margin is exactly why LFP forgives the small errors an ambitious first-time builder will inevitably make. It does not make the build risk-free.
A typical home target is a 48V (51.2V nominal) pack in the 10–15kWh range — enough to carry essential loads through an evening or a short outage. That voltage and capacity is the reference point for everything below.
The Two DIY Paths: Cell-Level vs Module-Level
Almost every decision that follows depends on which of these two paths you’re on. They are not “good vs bad” — they’re different trades of cost against time, skill, and risk. Find the row that matches your honest situation.
| Factor | Cell-Level DIY | Module-Level DIY |
|---|---|---|
| What you buy | Bare prismatic LFP cells (e.g. 16× 280Ah) + separate BMS + busbars + enclosure | Pre-assembled 48V module(s) with a built-in, certified BMS |
| Hardware cost (≈14kWh, excl. electrician) | Lowest — roughly $1,900–$2,800 incl. tools | Mid — roughly $2,000–$3,500, no special tools |
| Build time | High — 20–40+ hours (cell matching, welding, balancing, testing) | Low — hours to mount and wire, before electrician sign-off |
| Skill required | High — cell matching, BMS config, DC safety, torque discipline | Moderate — mounting, DC wiring, basic system integration |
| Main risk owner | You — cell quality and BMS behaviour are your responsibility | Shared — the certified BMS carries the cell-protection burden |
| Best for | Experienced hobbyists who want maximum control and lowest cost | Capable homeowners who want DIY savings without cell-level risk |
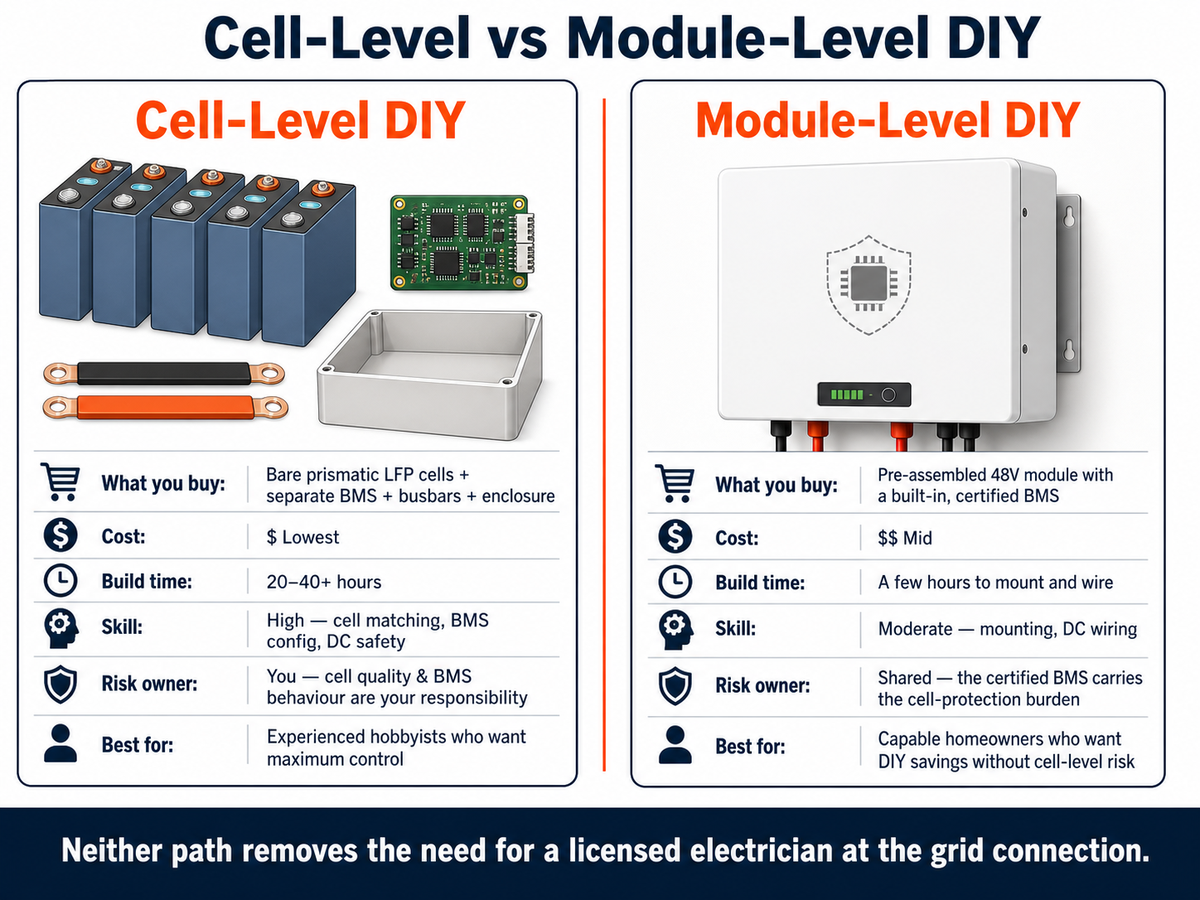
The honest takeaway: cell-level DIY is a genuine craft that rewards people who enjoy the process and have the skills. Module-level DIY exists for the larger group who want the savings and the hands-on install without personally underwriting the cell-matching and BMS-tuning risk. Neither removes the need for a licensed electrician at the grid connection.
The BMS Trust Gap
If you take one idea from this guide, make it this one. The Battery Management System is the component that stands between a wall of stored energy and a fire — and it’s the exact component cell-level builders most often under-invest in. I call the failure pattern the BMS Trust Gap: the distance between what a hobby-grade BMS is assumed to do and what it actually does when a cell drifts out of line.
Three specific things go wrong:
- Unmatched cells. Bare cells bought cheaply are rarely capacity- and internal-resistance-matched. As they age, the weakest cell hits voltage limits first, and a weak BMS lets it get over-discharged or over-charged repeatedly — the slow road to thermal runaway.
- Under-spec balancing. Many budget BMS units balance at a trickle current that can’t keep up with a real mismatched pack, so the imbalance grows instead of shrinking over months.
- No independent certification. A pre-assembled module built to recognized battery-safety standards (the kind of testing bodies like UL perform) has had its BMS behaviour, cell balancing, and fault response validated. A DIY-wired hobby BMS has been validated by exactly one person: you.
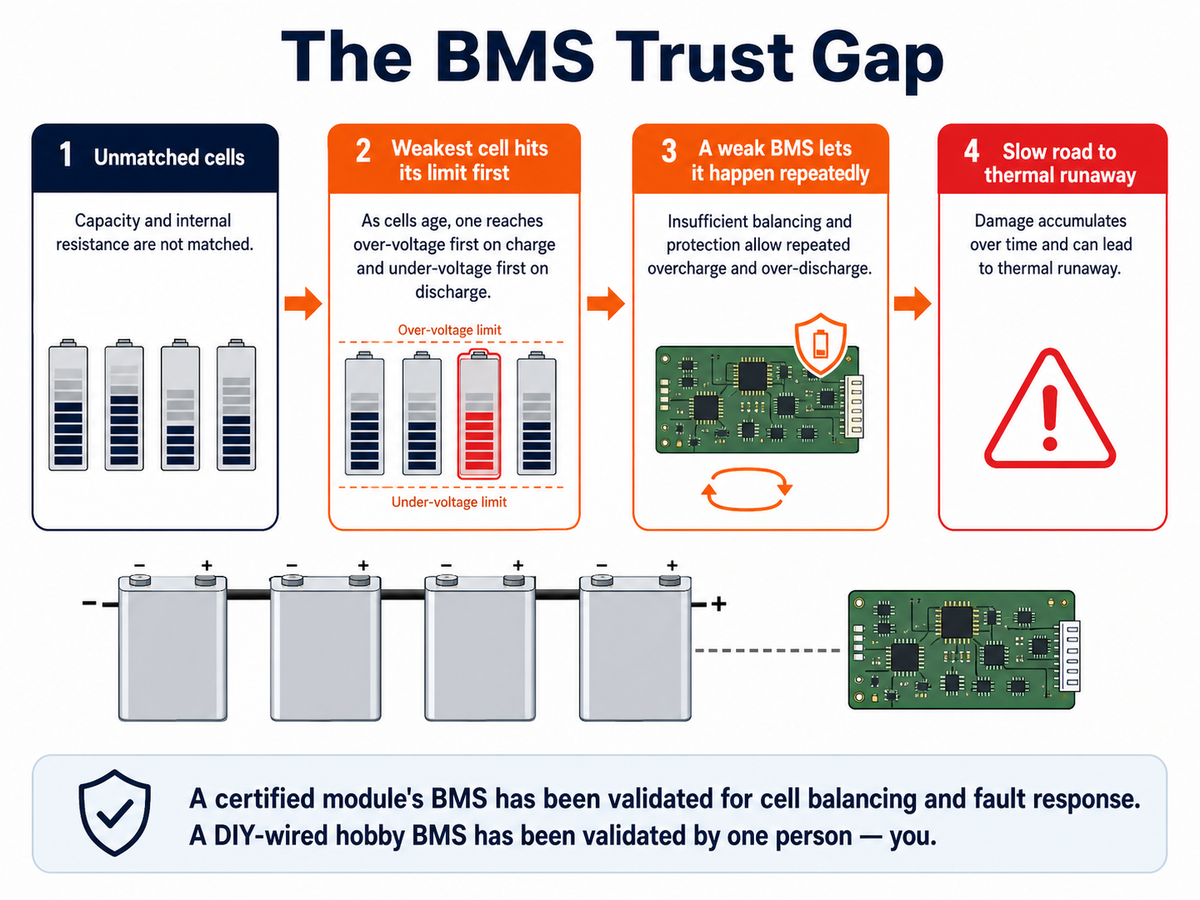
This is the real argument for module-level DIY — not that you can’t configure a good BMS yourself, but that a certified module closes the Trust Gap for you, so your remaining job is the lower-risk mechanical and wiring work. If you do go cell-level, spend more on the BMS than feels comfortable, and never buy salvaged or unmatched cells for a wall you’ll sleep next to.
What a DIY Powerwall Really Costs
“DIY is cheaper” is true, but the number people quote is almost always just the cells. Here’s the honest full-stack comparison for a ~14kWh, 48V build in the US, with the costs first-timers forget in bold.
| Line item | Cell-Level DIY | Module-Level DIY | Turnkey (bought + installed) |
|---|---|---|---|
| Battery (cells or modules) | $1,400–$2,000 | $2,000–$3,500 | $3,000–$4,500 |
| BMS | $150–$400 (separate) | Included & certified | Included |
| Busbars, enclosure, tools | $300–$500 (incl. spot welder) | Minimal | — |
| Licensed electrician (interconnect) | $500–$1,500 | $500–$1,500 | Included |
| Your time | 20–40+ hrs | A few hrs + sign-off | Minimal |
| Approx. total | $2,350–$4,400 | $2,500–$5,000 | $4,000–$6,000+ |
Two things jump out. First, once you include the electrician and tools, cell-level and module-level DIY land closer together than the raw cell price suggests — module-level buys you back most of that gap in time and risk. Second, both DIY paths genuinely undercut turnkey, which is why the project is popular. Use the off-grid battery calculator to size your real capacity target before you price anything, so you’re not paying for kWh you’ll never cycle.
What You Can DIY vs What Needs a Licensed Electrician
This is the decision route that keeps a DIY build both legal and insurable. Not every step is yours to take — and the ones that aren’t are the ones most likely to burn down a house or void a claim if done wrong. Here’s where the line generally sits in the US; your local Authority Having Jurisdiction (AHJ) is the final word.
| Task | Typically DIY-able | Needs a licensed electrician / permit |
|---|---|---|
| Sizing & component selection | ✅ Yes | — |
| Assembling / mounting the battery pack or modules | ✅ Yes (module-level); ⚠️ skill-dependent (cell-level) | — |
| Low-voltage DC wiring between battery and inverter | ⚠️ Yes if competent & correctly fused | Some AHJs require sign-off |
| BMS configuration & testing | ✅ Yes | — |
| AC / grid interconnection | 🔴 No | ✅ Licensed electrician + permit + inspection |
| Main panel / service changes | 🔴 No | ✅ Licensed electrician + permit |
Is It Safe to Build Your Own Powerwall?
Yes — a DIY LiFePO4 powerwall can be as safe as a commercial one, if three conditions are met: matched, quality cells; a properly specified BMS (or a certified pre-assembled module); and a licensed electrician handling the grid connection. LFP chemistry gives you a wide safety margin, but that margin is spent quickly by unmatched cells and an under-spec BMS. The builds that make the news tend to be cell-level projects using salvaged or mismatched cells with a hobby BMS — the exact combination the BMS Trust Gap describes.
How the Decision Plays Out: Three Scenarios
Picture a hands-on off-grid builder in Arizona with a cabin and time on their hands. They want maximum control and lowest cost, they already own a spot welder, and they enjoy the process. Cell-level DIY is the right call — provided they buy matched Grade-A cells and spend up on the BMS rather than saving $100 on the one component that protects the whole pack.
Take a suburban homeowner who’s handy — comfortable mounting equipment and running conduit — but has never balanced a battery pack and doesn’t want to become a cell-matching expert to save a few hundred dollars. Module-level DIY fits: they buy a pre-assembled 48V module with a certified BMS, mount and wire it themselves, and hand only the interconnect to an electrician. They get most of the DIY savings and close the Trust Gap entirely.
Consider someone whose real goal is a lower power bill, not a weekend project. They priced a cell-level build, added up the cells, BMS, busbars, a spot welder they’d use once, and 30 hours of their time — and realized the “cheap” build wasn’t much cheaper than a finished system once their time was valued honestly. For them, the right answer isn’t DIY at all; it’s a proper home battery backup system. Knowing this before you buy cells is the most valuable outcome this guide can give you.
Most Common DIY Powerwall Mistakes
1. Buying salvaged or unmatched cells
✗ Wrong: chase the cheapest cells on the marketplace.
✓ Right: buy matched, Grade-A LFP cells from a reputable source — the pack is only as safe as its worst cell.
2. Saving money on the BMS
✗ Wrong: pair a $2,000 cell pack with a $60 BMS.
✓ Right: spec the BMS for your real continuous current and balancing needs — or buy a module with a certified BMS built in.
3. Skipping fusing and correct cable sizing
✗ Wrong: guess at cable gauge and skip the DC fuse.
✓ Right: size conductors and protection to the current — start with a 48V cable size chart.
4. Doing the grid interconnection yourself
✗ Wrong: wire it into the main panel over a weekend, no permit.
✓ Right: licensed electrician + permit + inspection — non-negotiable for safety, insurance, and legality.
5. Mismatching the inverter to the battery
✗ Wrong: buy the inverter last and hope it talks to the BMS.
✓ Right: confirm inverter/BMS compatibility up front — see the inverter–battery pairing guide.
Frequently Asked Questions
How much does a DIY LiFePO4 powerwall cost?
For a ~14kWh, 48V build in the US, expect roughly $2,350–$4,400 for a cell-level DIY (cells, BMS, busbars, enclosure, tools, and a licensed electrician for the interconnect) and $2,500–$5,000 for a module-level build using pre-assembled certified modules. Both undercut a turnkey installed system at $4,000–$6,000+, but the gap narrows once you value your own time honestly.
Is it safe to build your own powerwall?
It can be, with three conditions: matched quality LFP cells, a properly specified BMS (or a certified pre-assembled module), and a licensed electrician for the grid connection. LFP chemistry is thermally stable, but unmatched cells with an under-spec BMS are a leading cause of DIY powerwall fires.
Do I need an electrician for a DIY powerwall?
For the battery assembly and low-voltage DC side, often no — a competent builder can handle it with correct fusing. For the AC interconnection to your home’s electrical system and any main-panel work, yes: this requires a licensed electrician, a permit, and inspection under the National Electrical Code in virtually all US jurisdictions.
What BMS do I need for a DIY LiFePO4 build?
Size the BMS to your pack’s continuous discharge/charge current with headroom, ensure the balancing current is adequate for your cells, and prioritize protection features over price. If specifying and trusting your own BMS feels uncertain, a pre-assembled 48V module with a certified BMS removes that decision entirely.
Can I use salvaged battery cells for a powerwall?
You can, but it’s the highest-risk path. Salvaged cells are unmatched in capacity and internal resistance and often have unknown history, which forces the BMS to work far harder and raises the long-term failure risk. For a battery mounted on your home, matched new LFP cells — or certified modules — are strongly recommended.
Cell-level or module-level DIY — which should I choose?
Choose cell-level if you’re an experienced hobbyist who wants maximum control and lowest cost and enjoys the build. Choose module-level if you want the DIY savings and hands-on install without personally owning the cell-matching and BMS-tuning risk. Both still need an electrician for the interconnect.
About This Guide
Savolture offers a lineup of LFP home-storage batteries and pre-assembled 48V modules built to UL standards, serving both US installers and capable DIY builders. We wrote this guide because of a question we regularly hear from people mid-build: “should I keep going cell-level, or is a module the smarter move for me?” The honest answer depends on your skills, your time, and your appetite for owning the BMS risk — which is why this guide is a decision framework, not a sales pitch or a wiring tutorial. Whatever path you take, have your grid connection done by a licensed electrician.
| Talk to Savolture | |
|---|---|
| Going module-level? | 01 target capacity (kWh) · 02 inverter brand · 03 grid-tied or off-grid — we’ll confirm a compatible 48V module configuration. |
| Chemistry | LFP (LiFePO4), 6,000+ cycles at 80% DoD, certified BMS built in |
| Standards | Modules built to UL standards — closes the BMS Trust Gap for your build |
| Contact | HQ Shenzhen, Nanshan · LinkedIn |
Bottom line: a DIY LiFePO4 powerwall is a genuinely great project — if you go in clear-eyed about which path you’re on and where your responsibilities end. Match your cells, respect the BMS, size your cables, and hand the grid connection to a licensed electrician. Do that, and you’ll have a wall of safe, cheap, decade-plus storage you built yourself. Skip those, and you’ve bolted a hazard to your house. The difference isn’t luck — it’s the four or five decisions above.
- UL — battery and energy-storage safety standards: UL 1973 (batteries for stationary applications) and UL 9540 (energy storage systems), covering cell/BMS testing and fault response. ul.com
- NFPA — National Electrical Code (NFPA 70), governing home electrical and interconnection work. nfpa.org
- U.S. Department of Energy — Homeowner’s Guide to Going Solar (permitting, interconnection, working with installers). energy.gov
Ready to size your system?
Get a free battery recommendation.
Tell us your load, location, and backup target — we will spec the right 48V LiFePO4 system for you.